Creating a New Xcode Project for a SwiftUI App
Everyone was a beginner at some point, and this article is for those just starting out.
For pure SwiftUI apps, there are some changes in the app life cycle in Xcode 12 that affect the creation of a new project.
So here is a brief description of how to get started with the most basic form of iOS app using SwiftUI in both recent versions of Xcode.
Xcode 12
From the menu, choose File → New → Project... or use the keyboard shortcut Shift-Command-N.
Now you will choose a project template. In this sheet, select the iOS tab, then App, then press Next:
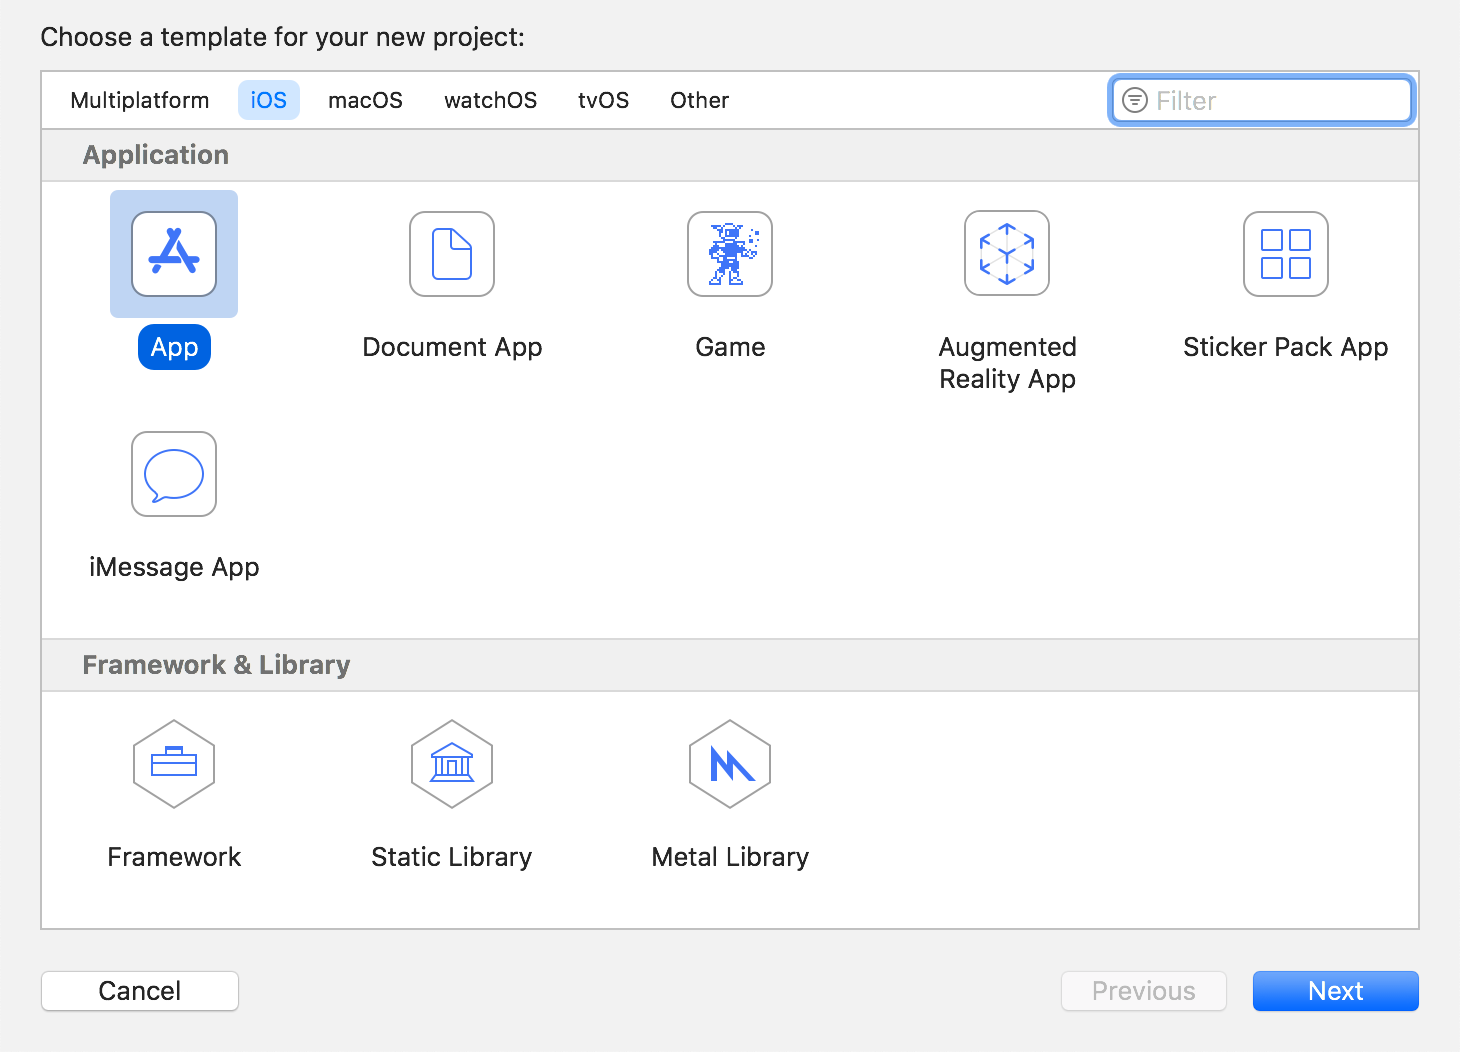
The following sheet allows you to select various options for the project. It looks like this:
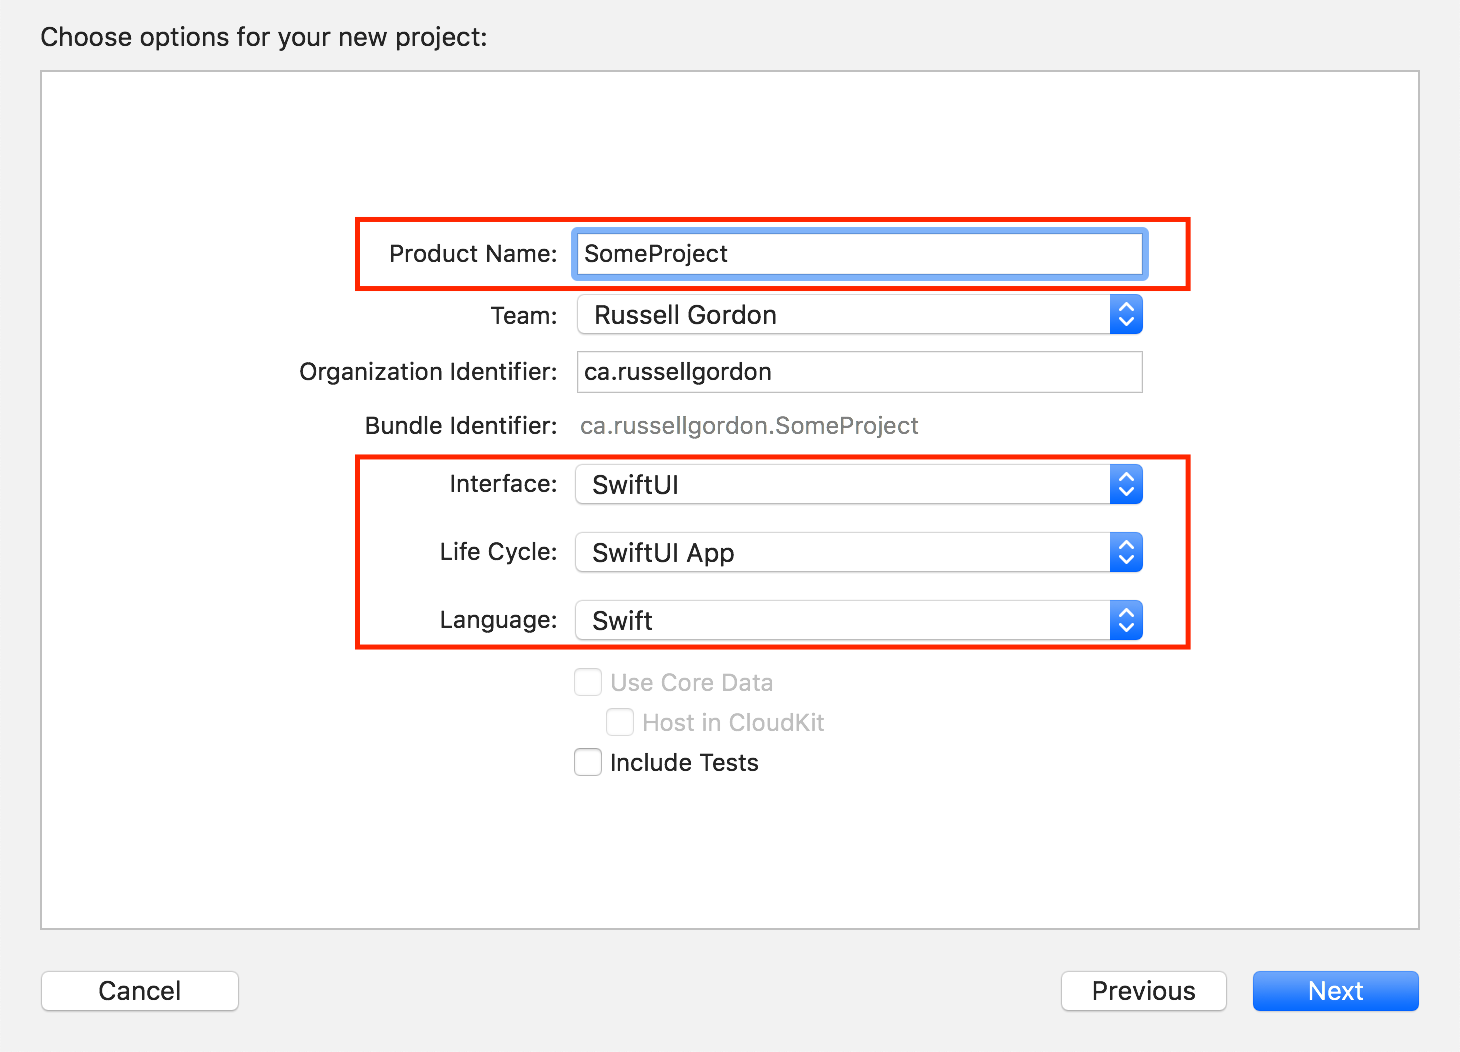
Make the Product Name something concise but descriptive that will allow you to find the project on your computer in the future. Don't worry – the name you choose here does not commit you to using that same name for what end-users will eventually see for your app on their home screen icon and in the App Store.
If you see an Add account... button rather than a pop up menu to select a team, then press the button and follow the steps to either log in with, or create a new, Apple ID. This will be helpful later on – having a team specified for your project will permit you to load your app on to devices for testing purposes.
You can leave the Organization Identifier field with its default value.
Be sure that the Interface field is set to SwiftUI.
The Life Cycle field should be set to SwiftUI App.
The Language field should be set to Swift.
All of the various checkboxes at the bottom of this sheet can be unchecked.
Now, press the Next button.
You will then see a sheet that allows you to select where to save your work. I really recommend being organized about where you save your work on your computer. The sheet looks like this:
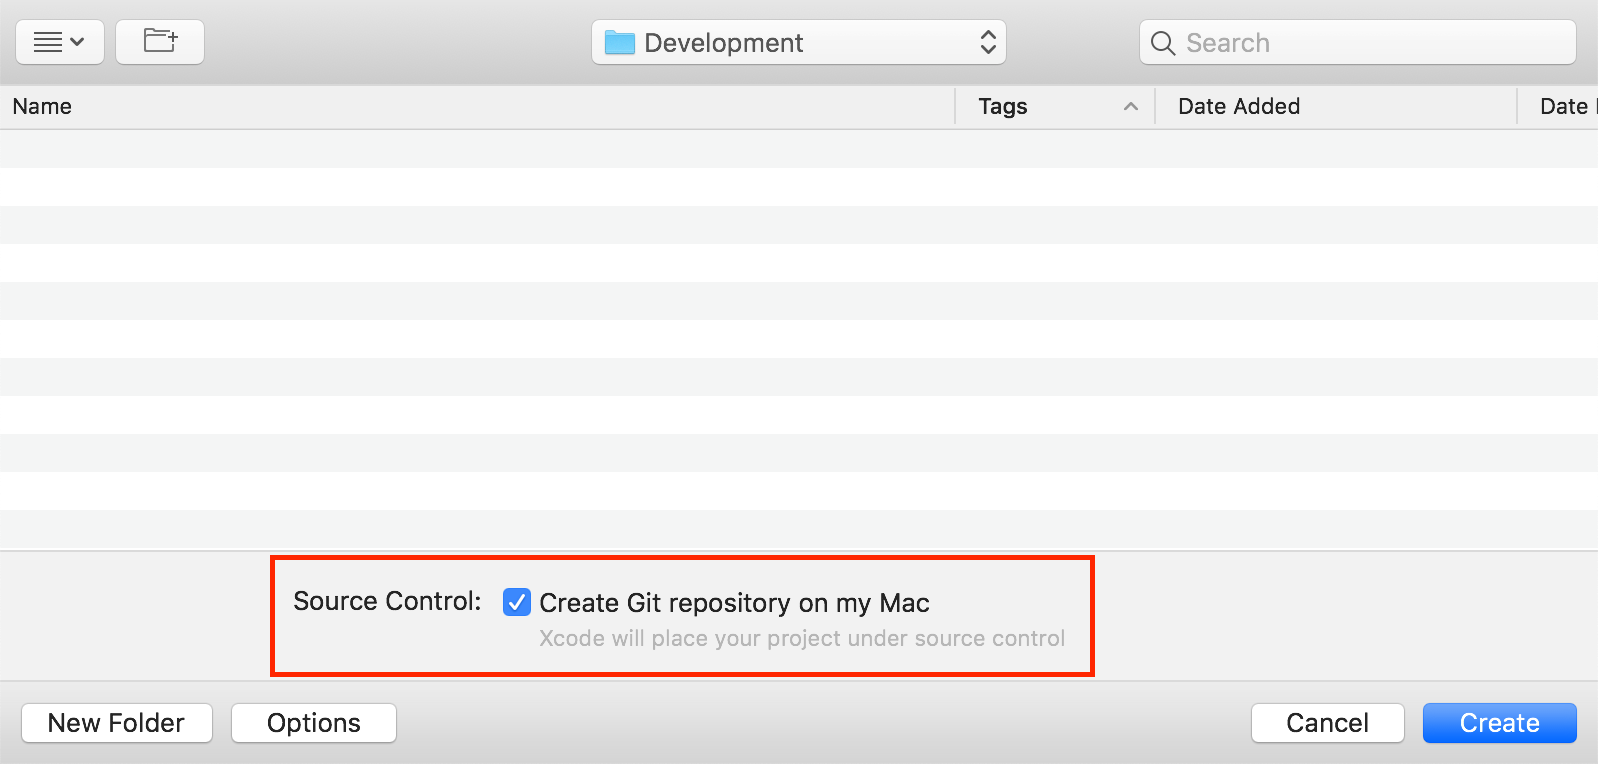
Be sure to enable source control, so that a git repository is created, as pictured. More on source control in another post, but basic usage of git is not hard, and there are many benefits.
Then, press the Create button.
That's it! You're ready to start building your SwiftUI-based iOS app in Xcode 12. 🚀
Xcode 11
From the menu, choose File → New → Project... or use the keyboard shortcut Shift-Command-N.
Now you will choose a project template. In this sheet, select the iOS tab, then Single View App, then press Next:
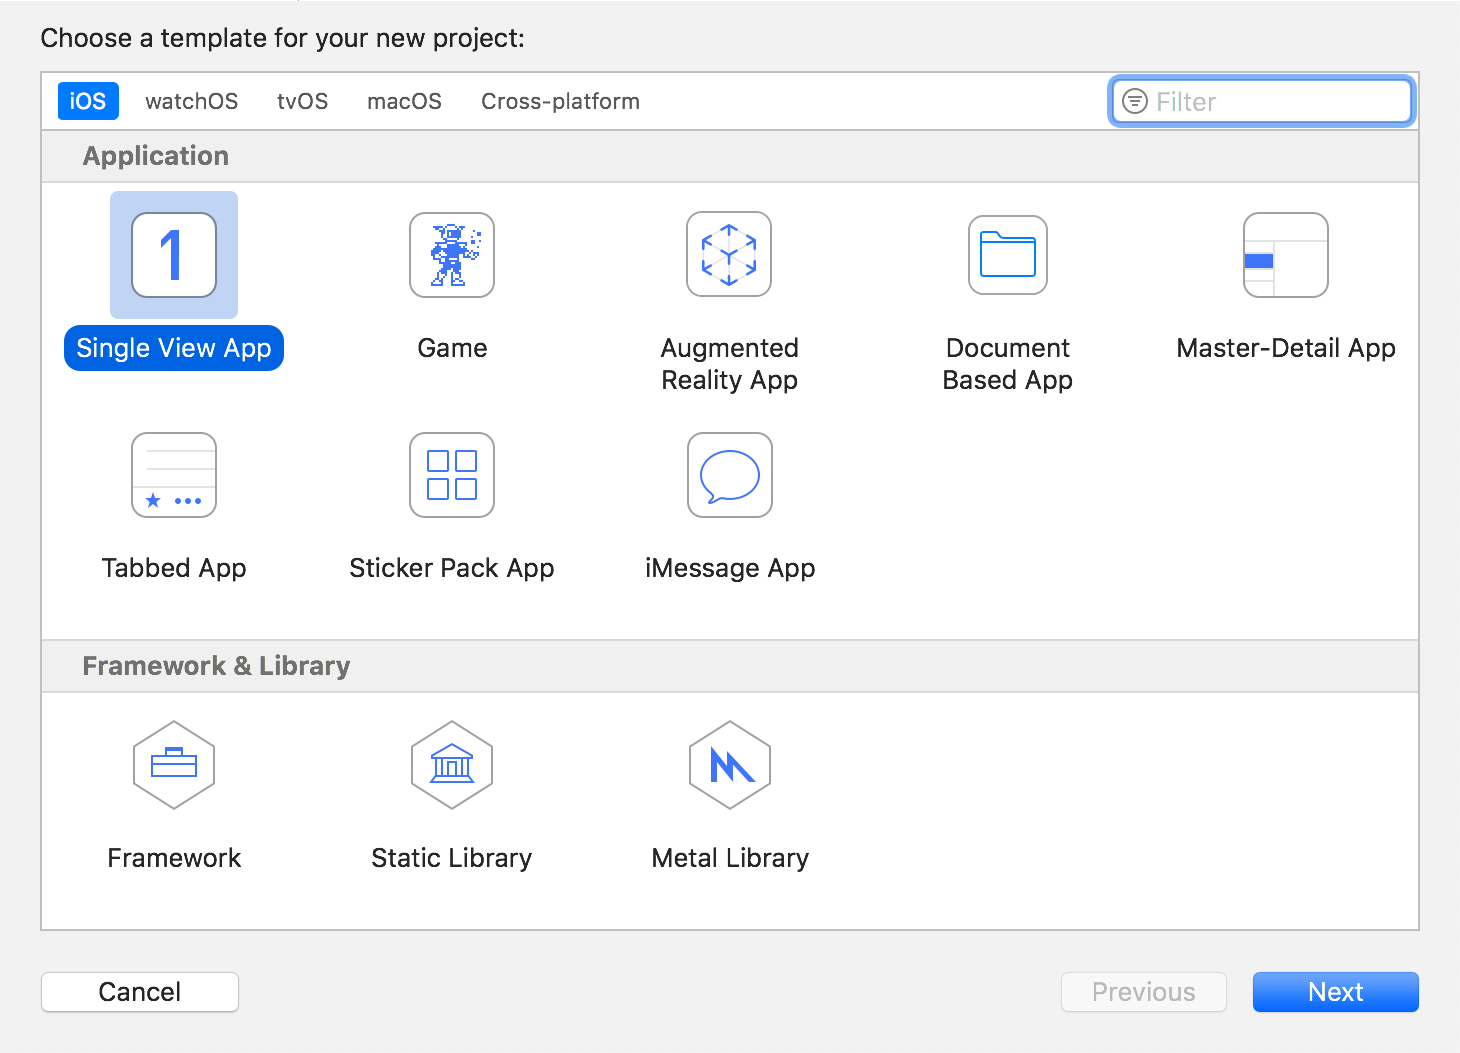
The following sheet allows you to select various options for the project. It looks like this:
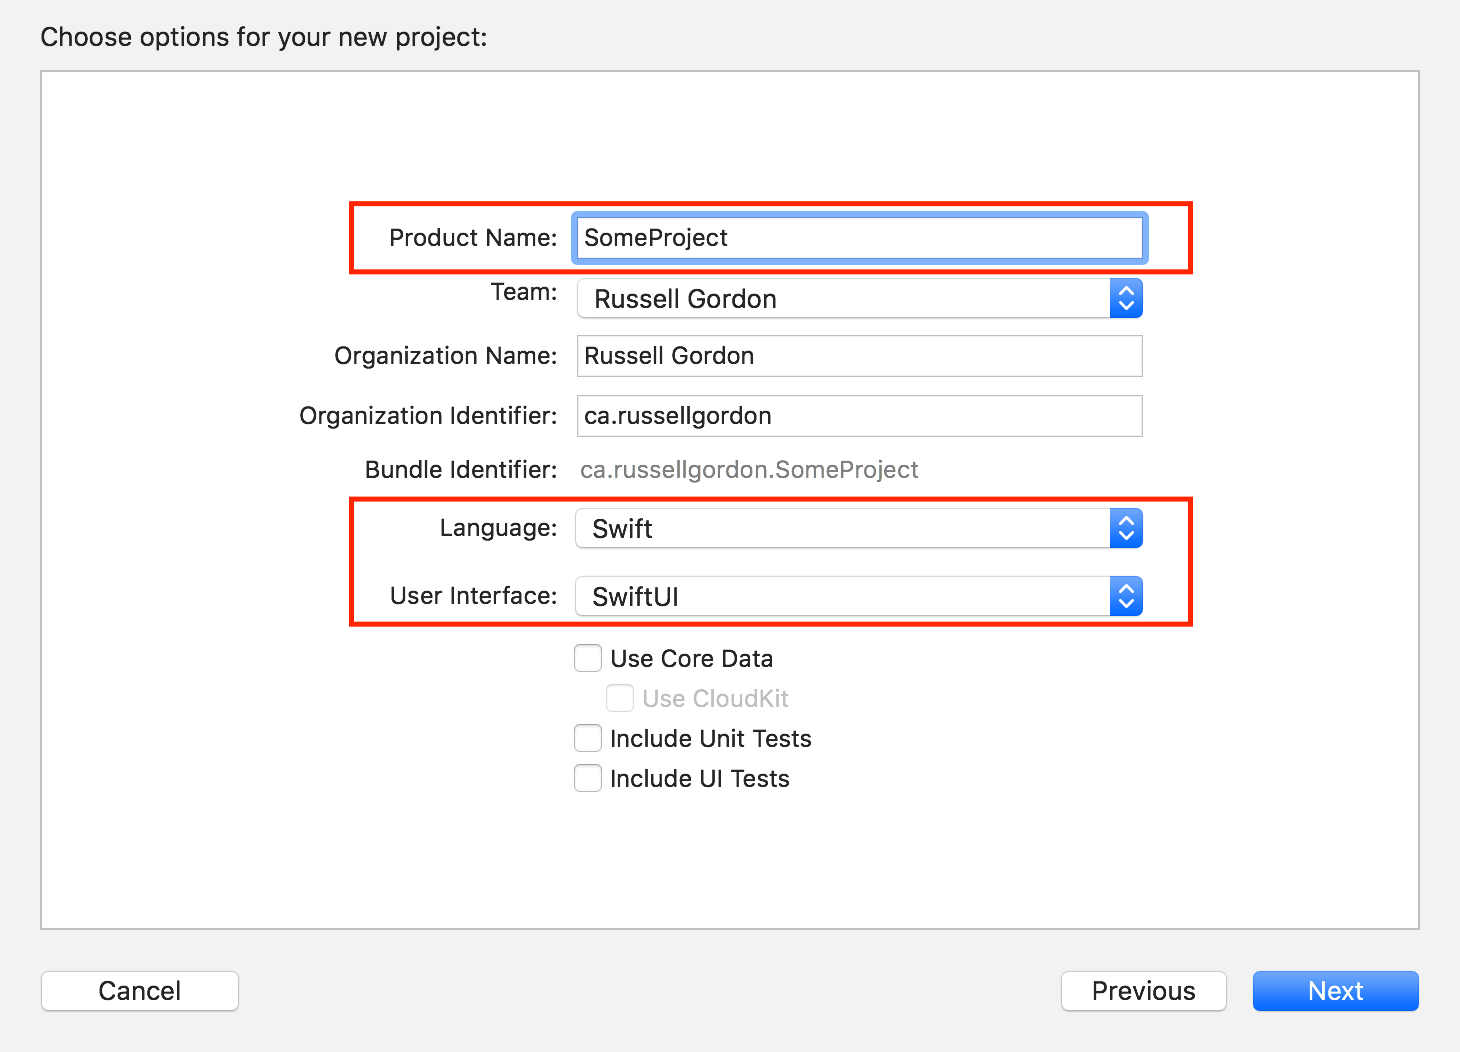
Make the Product Name something concise but descriptive that will allow you to find the project on your computer in the future. Don't worry – the name you choose here does not commit you to using that same name for what end-users will eventually see for your app on their home screen icon and in the App Store.
If you see an Add account... button rather than a pop up menu to select a team, then press the button and follow the steps to either log in with, or create a new, Apple ID. This will be helpful later on – having a team specified for your project will permit you to load your app on to devices for testing purposes.
You can leave the Organization Name and Organization Identifier fields with their default values.
The Language field should be set to Swift.
Set the User Interface field to SwiftUI.
All of the various checkboxes at the bottom of this sheet can be unchecked.
Now, press the Next button.
You will then see a sheet that allows you to select where to save your work. I really recommend being organized about where you save your work on your computer. The sheet looks like this:
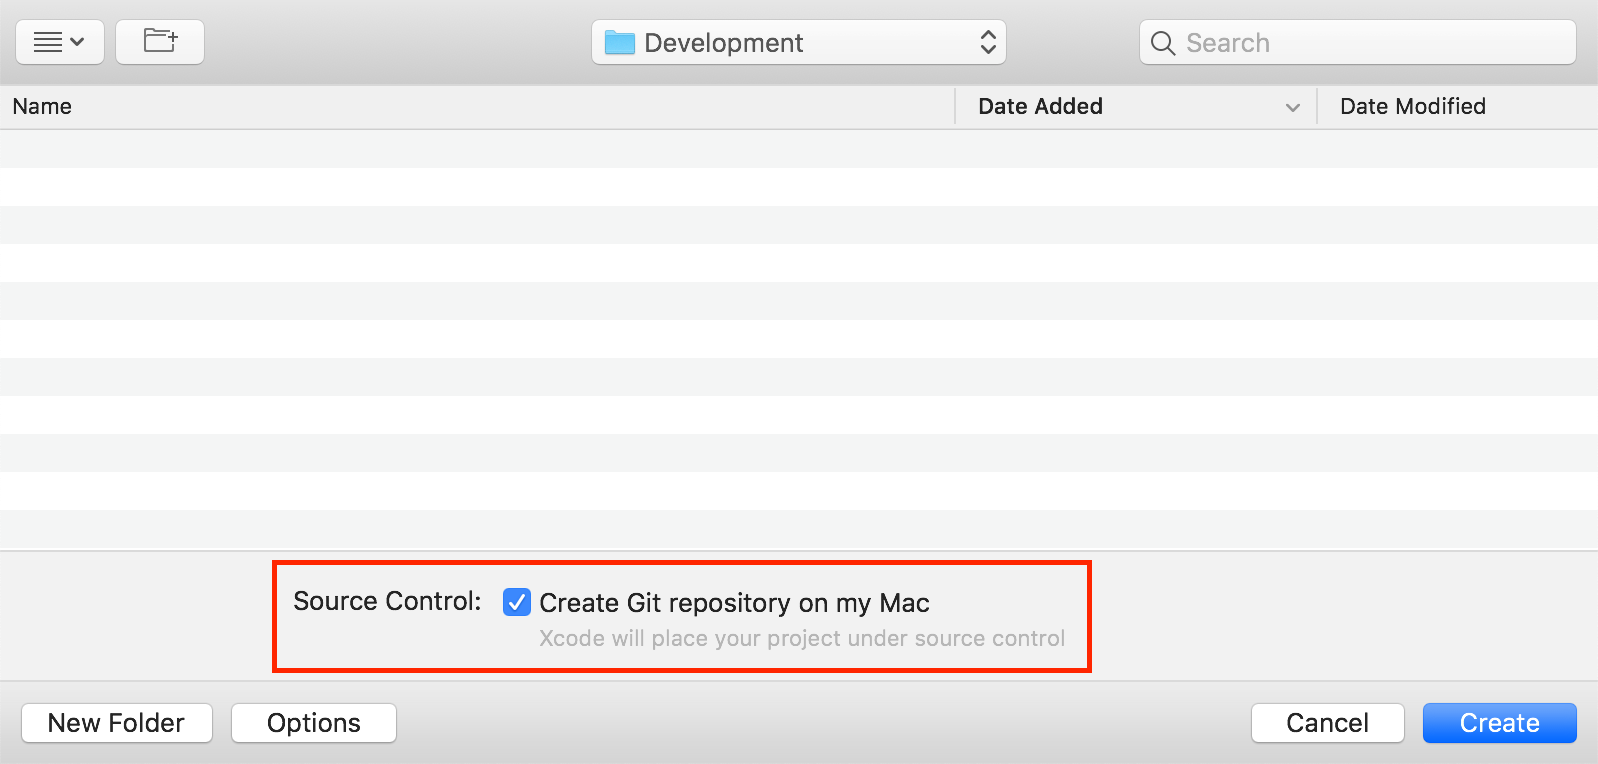
Be sure to enable source control, so that a git repository is created, as pictured. More on source control in another post, but basic usage of git is not hard, and there are many benefits.
Then, press the Create button.
That's it! You're ready to start building your SwiftUI-based iOS app in Xcode 11. 🚀